Dropshipping from HomeDepot to Shopify is a proven method that works for thousands of dropshippers. HomeDepot is one of the biggest home improvement suppliers worldwide, offering reliable customer support, fast shipping, competitive prices, and top-notch products.
Additionally, Shopify is a selling channel that enables the full customization of our dropshipping stores and adding of as many items as we want without worrying about product listing limits.
However, we consume a significant time and effort when manually importing products from HomeDepot to Shopify. That’s why this article will guide us on how to import dropshipping products from HomeDepot to Shopify utilizing efficient and convenient methods.
How to Import Products from HomeDepot to Shopify

Here’s how you can import dropshipping products from HomeDepot to Shopify using three techniques:
- Single Product Uploader
- Using A Product’s URL or ID (Single & Multiple Products)
- Bulk Importer
To better understand how we can utilize these straightforward methods, here is a quick guide to each one of them:
A new .store domain option is now available for Shopify users, greatly improving trust and brand image. This feature is free for the first year, with future fees handled by a third-party service. You can find it under Shopify store settings.
1. Single Product Uploader
The first method to import products from HomeDepot to Shopify is the Single Product Uploader. Using this method, we can import a single product quickly in one to two seconds.

Commence importing the item by going to the product’s page of the HomeDepot product you want to add. Next, copy the product’s URL or ID.

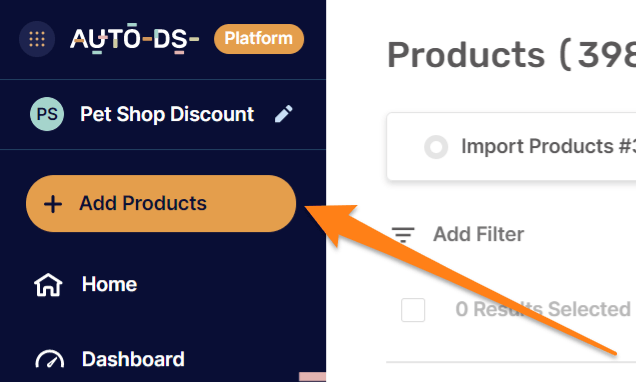
Now, on AutoDS, click on ‘Add Products’ on the platform’s left sidebar.

Continue the import process by clicking the ‘Single Product’ option and pasting the URL or product ID of the item.

Then, click the ‘Edit Now (Quick)’ bar, and afterward, an item editor will appear on the upper part of the page, meaning that the importing process has begun.

When the colors of the ‘Save’ and ‘Save & Import’ bars change, it signifies that the product is ready for optimization.

The optimization process will allow you to edit the product details, description, variants, images, specifications, and a lot more.

After optimizing the product information, click the ‘Save’ button to apply the changes.

When you’re ready to import the product to your online store, click the ‘Save and Import’ button.

Once the product is available on the ‘Products’ page, our audience will be able to view and purchase it on our Shopify dropshipping stores.

2. By URL or ID (Single & Multiple Products)
Copying an item’s URLor ID onto the AutoDS platform is our second method of product importing. With this method, we can add single or multiple products from HomeDepot to Shopify.

To begin, copy the product’s URL or ID from HomeDepot, and click on the ‘Add Products‘ bar on the AutoDS site. Next, click the ‘Multiple Products & Stores’ option.

Then, add the product by pasting the URL or ID. You can list numerous products by pasting more URLs or IDs with a line break in between.
After pasting the products’ URLs or IDs in the dialog box, transfer the items to the ‘Drafts‘ section by clicking on ‘Add as a draft.’

Once the products move to the ‘Drafts‘ page, we can start optimizing the products’ information. We can optimize the product’s title, collections, description, variants, images, specifications, and more.

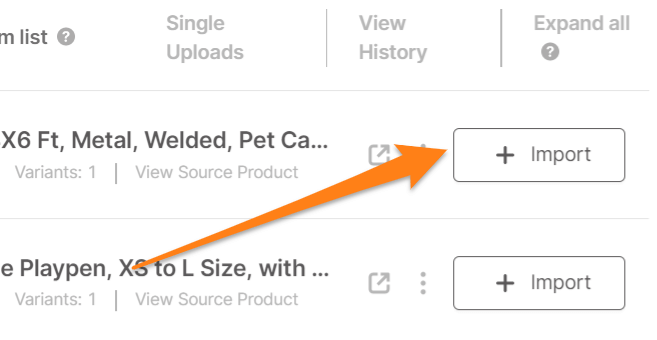
Next, after the optimization process is complete, click the ‘Import‘ button.

This step will move the items to the ‘Products‘ page of the AutoDS platform.

Once we see the items in the ‘Products‘ section on AutoDS, we know that the product is live on our Shopify dropshipping store for customers to purchase.
3. Bulk Importer
The third technique to import products is by importing in bulk through a CSV File. When using this method, we can import tens, hundreds, or even thousands of dropshipping products at once from HomeDepot to Shopify.
But first, we need to install the AutoDS helper extension to be able to utilize this feature.

Now, we can enter HomeDepot and search for trending products we want to add to our Shopify dropshipping store.

On the product search results page, click the AutoDS extension icon. Then, on the dialog box that appears, click on ‘Extract.’

After clicking on ‘Extract,’ the IDs of all items on the page will show up in the extension box. Click on the ‘Export as CSV’ option to export a CSV file with the product IDs inside.

After clicking on ‘Export as CSV’, a CSV file containing the available product IDs will automatically download onto our computer.

Next, add the CSV file to AutoDS. Do this by clicking on the ‘Add Products’ button and selecting ‘Multiple Products & Stores’.

Now, click the ‘Upload CSV’ tab and drag and drop the CSV file in the dialog box. Alternatively, you can click on the ‘Drop CSV File’ to open up your file browser to locate the CSV file and double click on it.

At this point, AutoDS will automatically import all products in the CSV file to the ‘Drafts‘ page.

When the optimization process ends, click the ‘Import’ button to transfer the items from the ‘Drafts’ section to the ‘Products’ page.

Finally, the items are now on the ‘Products‘ page. Shoppers can start exploring and buying live products on our Shopify store.

Here is one of the products that we just imported, live on our Shopify dropshipping store:

That concludes the importing process. Try it out and see how simple it is to save a massive amount of time!
Conclusion
Congratulations, you are now an expert in importing products from HomeDepot to Shopify! Start by listing product ideas to your dropshipping stores by choosing the technique that works best.
With the help of these efficient importing methods, we can dedicate our time and efforts to building up our dropshipping venture instead of wasting hours on end importing products manually.
Continue expanding your Shopify dropshipping knowledge with these related articles:


