Since being founded back in 95’ as an auction site, eBay has become one of the world’s largest eCommerce marketplaces. With millions of visitors per day, it is the perfect platform to sell on without significant upfront capital.
In fact, requiring far less financial input than a regular store, eBay dropshipping could provide an excellent gateway to online retail. Whether for sellers just starting or those looking to test some products.
Additionally, getting started is easy. All we need is to sign up and create our eBay seller accounts. Having said that, eBay holds sellers to a high standard to assure customer satisfaction. That is to say, make sure to follow the set-up steps carefully to avoid account suspensions.
So, keep reading to ensure a smooth start to our first eBay dropshipping stores. Follow the steps below and start making your first sales in no time.
How To Create an eBay Seller Account
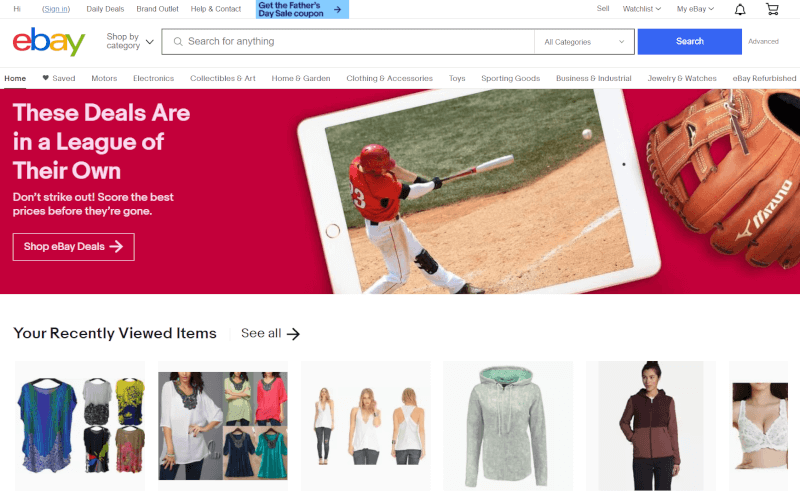
Alright! Let’s get you started. Set up is straightforward and only requires two general steps:
Now, let’s go over how each step works.
Step 1: Create Your Free eBay Account
For the first step, here is an overview of how to create a free eBay account:
- Sign up and create an eBay account
- Register an eBay seller account
- Choose an account type
- List an item as a draft & fill out the sell your item form
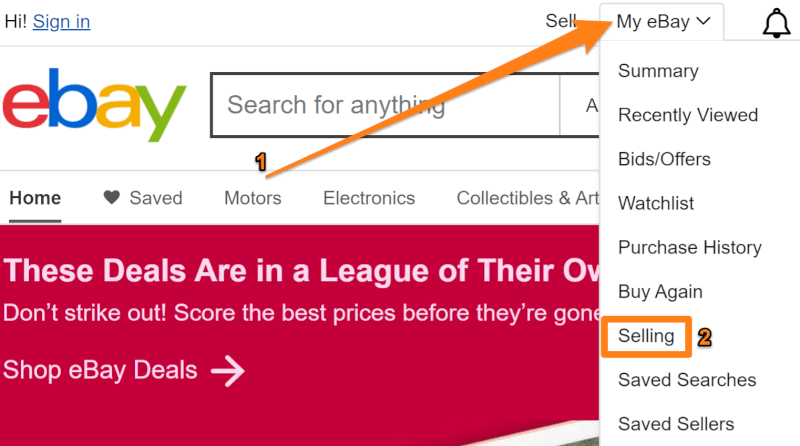
To begin, head over to eBay and select ‘Selling’ from the ‘My eBay’ drop-down menu. After you click ‘Selling,’ you’ll reach the sign-in and sign-up page. Choose ‘create an account’ to register. Doing so will lead you to the following page.
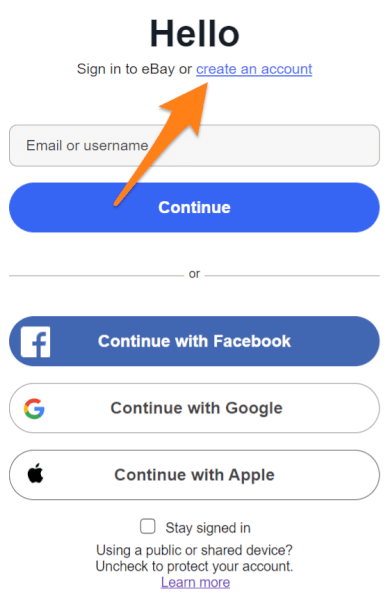
Then, fill in your details and click ‘Create account.’ Before you do so, you will need to choose between the two account types, personal or business.
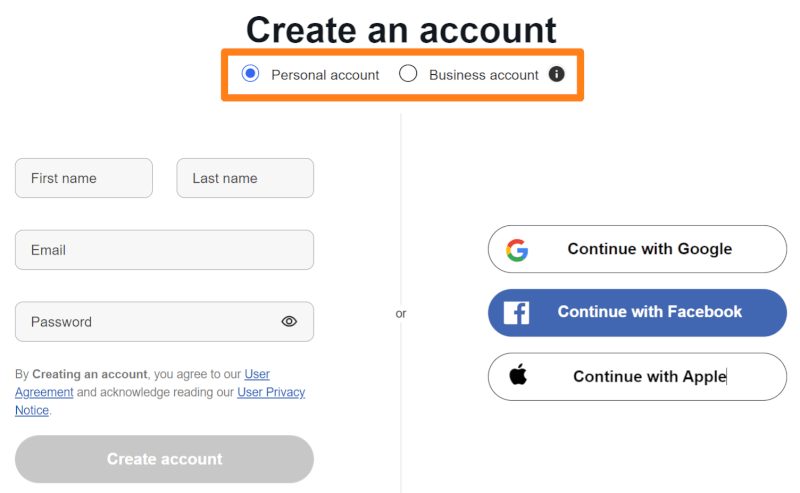
eBay Business Account vs. Personal Account?
When registering your eBay seller account, there are two account types to choose from, as previously mentioned:
- Personal Account
- Business Account
If you do not have a registered business, it is best to proceed with your eBay seller account as a personal account. Meanwhile, if you’re creating an account as a sole proprietor or for a company, the business account suits you best.
Moreover, the most significant differences between the two account options are as follows:
- Selling Limits
- Seller Account Fees
- Account Set-Up
Generally, eBay places listing limits on new individual sellers. On the other hand, eBay allows higher limits for business accounts.
Next, there are different fee structures and schedules between the two account types when it comes to seller account fees. Bear in mind that it is against eBay’s rules to disguise ourselves as a private seller if we run a registered business.
Sign Up Requirements
Furthermore, signing up regardless of the account type is relatively easy. However, the verification process for personal accounts is quicker. The main requirements for individual sellers include:
- Full name
- Address
- Date of birth
- Social Security Number
However, you have to submit additional requirements when creating a business account. Besides the basics, you need to provide the following information:
- Individual identification information for beneficiaries
- Business name
- Registered business address
- Phone number
- Registration number
- Tax information
After completing your account registration, go back to the main ‘My eBay’ page and select ‘Selling.’ This is when you should see your seller account ‘Overview’ page. Next, click ‘List an item’ and create a product listing draft.
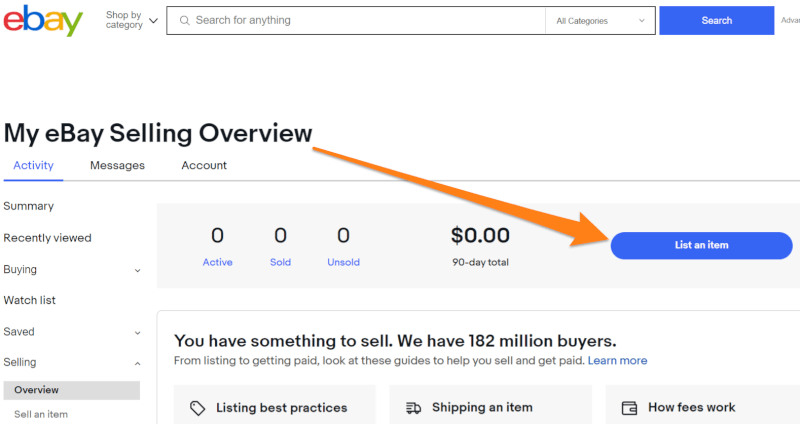
Then, enter a name of an item and fill out the ‘Sell your item’ form. After doing so, the website will direct you to a search page, where you can input UPC, ISBN, ePID, part number, or product name.

Once you complete the form, click ‘Submit.’ Afterward, eBay will redirect you to your next step, account verification. After verifying your account, you can start adding your first few products from home.
If we start dropshipping from the get-go, we risk temporary suspensions in which we’ll have to call eBay and answer questions regarding our business. While there’s nothing wrong with that, it’s easier to start with random products you have at home. Then, we can easily upgrade our selling limits.
Finally, we can continue diversifying our knowledge on how to correctly list products on eBay. Remember that the more trending products we have, the greater our chances of attaining huge sales.
Step 2: Verify Your eBay Account & Managed Payments
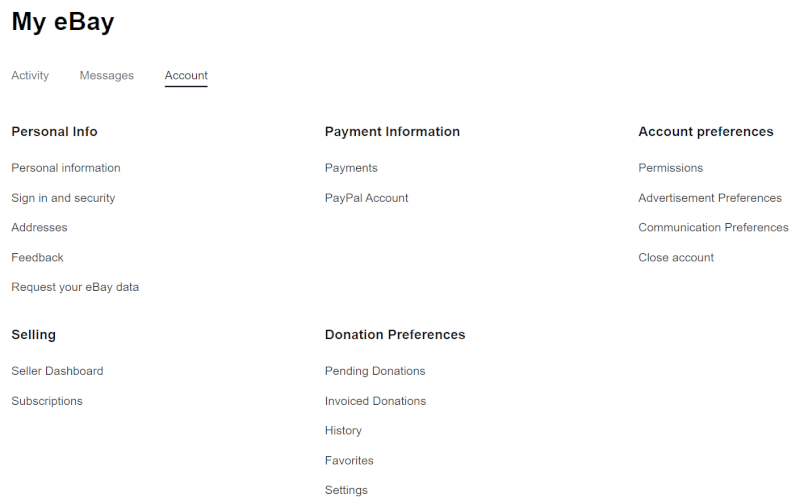
To use your eBay seller account, you first need to verify your account. The verification process applies when registering for a new account or updating any information on our account.
With that said, there are two factors to the verification process:
- Personal Information
- Payout Details
First and foremost, confirm your identity and basic account information to verify your account thoroughly. The identity verification includes your email address, phone number, and address.
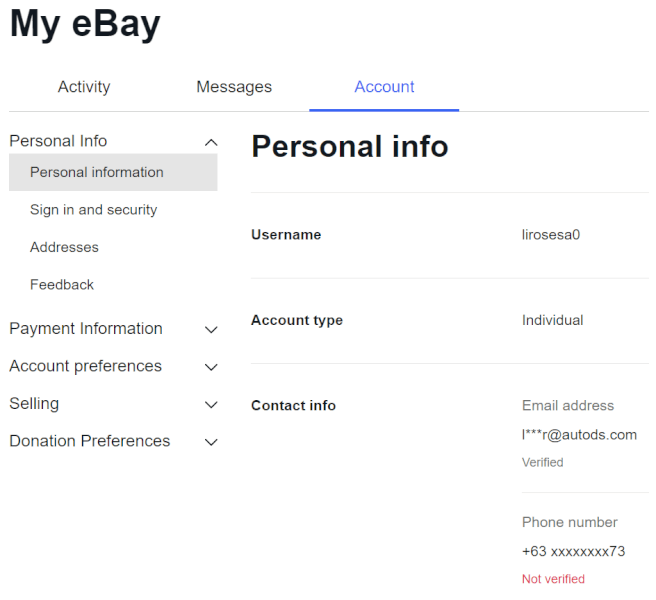
The next part of your eBay seller account verification process is payment verification. Payment verification consists of two parts:
- Payout Method Verification
- Credit Card Verification
Besides your preferred payout method, eBay requires a credit card or debit card on file. Likewise, this is standard protocol, and the use of your card will only be in the case of a payment failure.
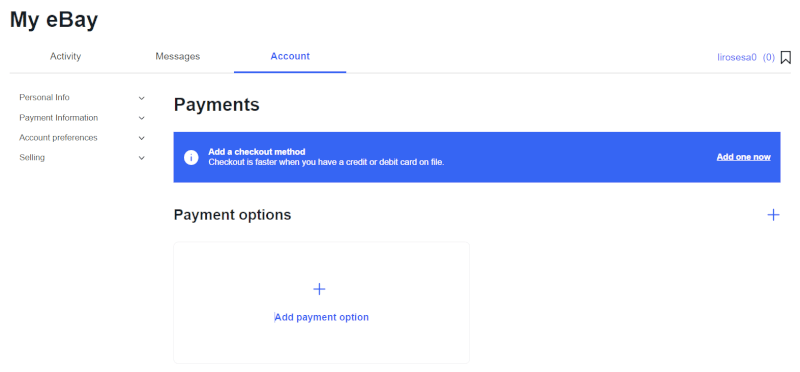
Once you have a card on file, select and verify your payout method. But first, let’s define what a payout means.
Payouts are financial disbursements in exchange for the services or products we provide to our customers. In relation to this, eBay offers two payout methods depending on your location:
- Bank Account
- Payoneer Account (eBay managed payments system)
Bear in mind that our payment method, whether a bank account, PayPal, or Payoneer, depends on eBay’s default option in our country. Therefore, Payoneer is not optional and is available only in select countries, such as China, Israel, and Russia. Meanwhile, other regions still utilize PayPal as a standard payment option on eBay.
For a step-by-step explanation of how to configure your payout settings, we recommend reading eBay’s help guides.
Below, we’ll understand the details of these payout methods.
Bank Payout Verification
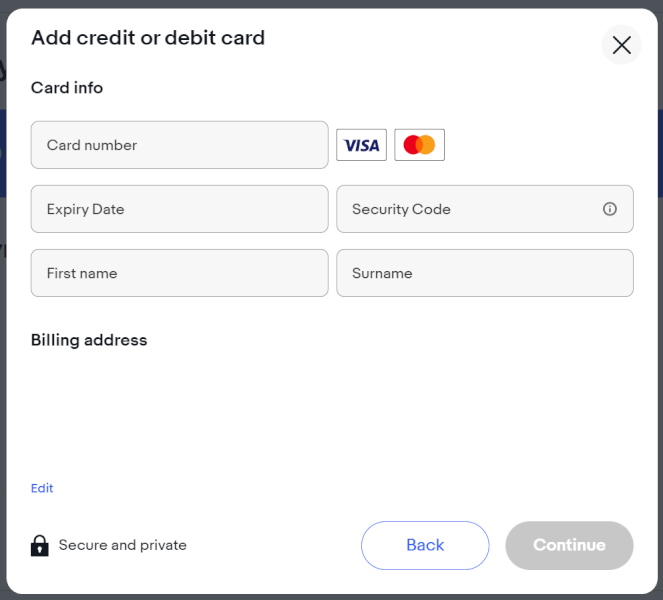
To receive payouts through your bank, you have to connect your checking account with eBay. For personal accounts, make sure that your name in the eBay account is similar to the bank details. Later on, if you wish to convert your account from personal to business, you can do so in the ‘Account settings’ on the eBay website.
On the other hand, if you’re handling a business account, the business name registered in your eBay account must be the same as that of the checking account.
In the verification of your bank account, eBay requires you to submit the following information:
- Name on the checking account
- Bank name
- Routing number
- Account number
Afterward, link your bank account and confirm your details. Then, you will receive a confirmation email from eBay after successfully verifying your information.
Finally, eBay processes your payout within two business days after confirming a customer’s order. Additionally, bank clearing time may take about one to three business days. Once the fund is cleared, you will receive the payout in your checking account.
Payoneer Payout Verification
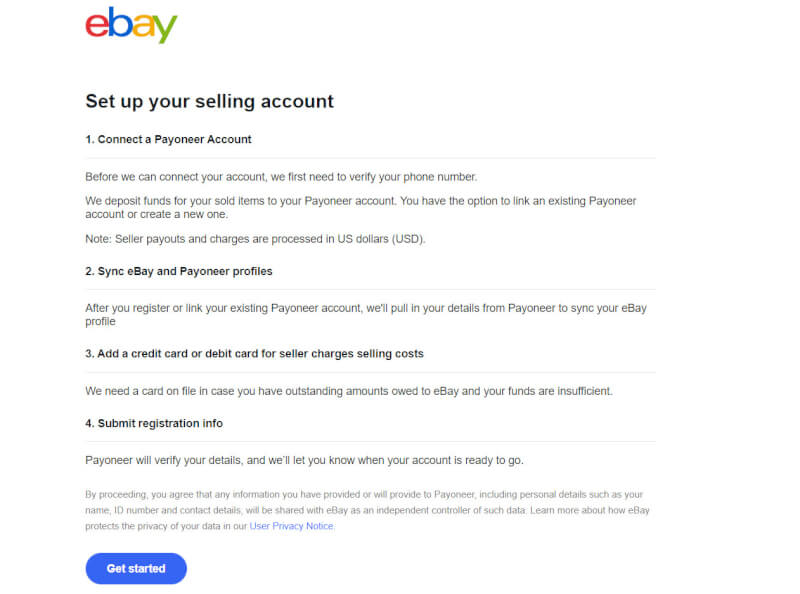
Another way of receiving payouts from eBay is through Payoneer. Payoneer is a financial solution for eCommerce worldwide. Thus, numerous dropshipping platforms like eBay utilize Payoneer as one of their payment methods.
Moreover, make sure that the account type and country of registration are the same on eBay and Payoneer. After linking these two accounts, the eBay system will automatically copy your Payoneer account details. Upon reviewing and confirming your details, they will show on your eBay account.
Subsequently, eBay shall ask you to add a debit or credit card account. Doing so ensures that you can still cover the selling fees if your store earnings are insufficient.
Before eBay account activation, Payoneer will review your account information and send you an email upon successful verification. Lastly, payouts through Payoneer are usually processed two banking days after a customer’s order confirmation.
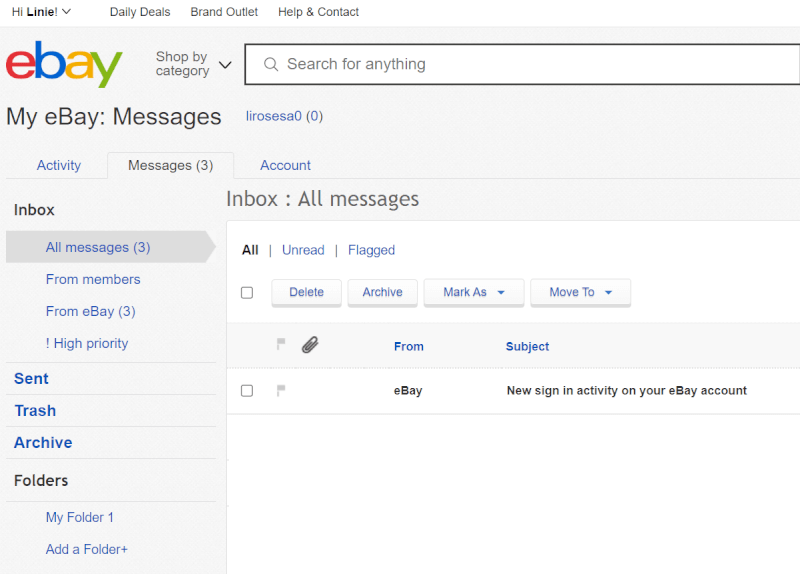
If any problem occurs during the verification process, eBay will notify you through ‘My eBay’ messages.
eBay Business Policies
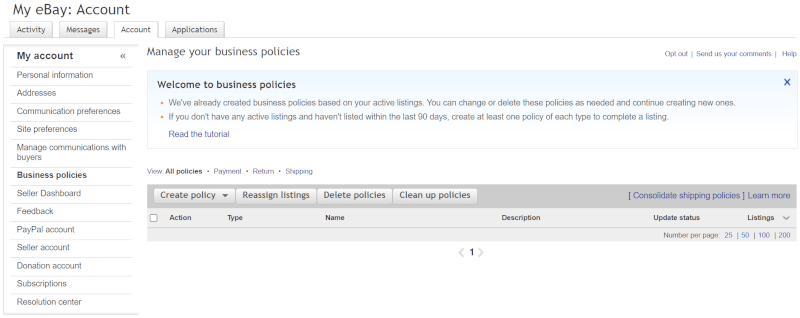
Every time we create a product listing, we have to set our eBay business policies. These policies include choices of payment methods, shipping arrangements, and return guidelines.
For convenience, we can utilize templates for our business policies, which we can edit whenever we list a product. So, here are the steps for creating eBay business policies:
- On the ‘My eBay’ dropdown menu, select ‘My Account.’
- Then, click ‘Manage.’
- Among the tabs present, choose ‘Account.’
- Then, on the left sidebar, click ‘Business policies.’
- Here, you can create your payment, shipping, and return policies.
- Also, you can reassign business policies to your product listings.
- Besides that, you can delete or clean up your policies, which are not used anymore.
Once again, we need to present practical business policies in our eBay stores. Furthermore, these policies will guide and educate our customers regarding how our business works.
eBay Shipping/Site Preferences
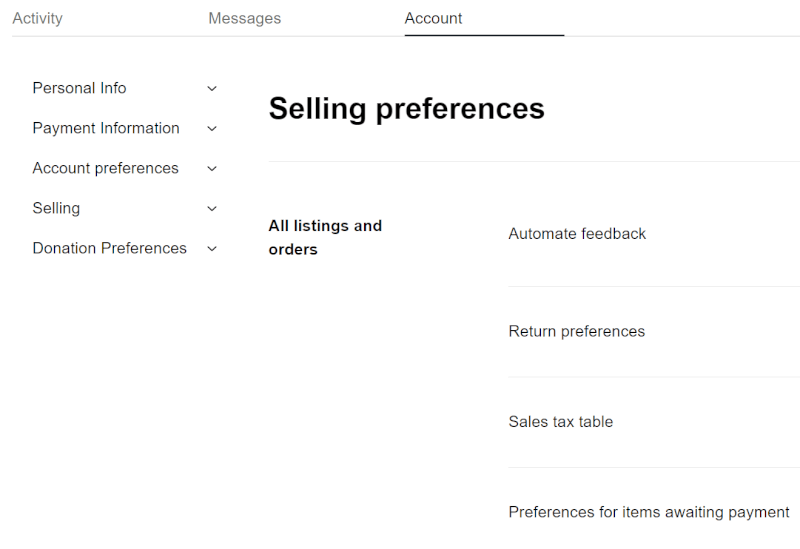
Meanwhile, the shipping/site preferences allow us to set up our selling information like shipping details. In addition, we can manage our listings, orders, buyers, and invoices through this feature.
To assign proper shipping/site preferences, we need to go over the following steps:
- On the ‘My eBay’ dropdown menu, select ‘My Account.’
- Then, click ‘Manage.’
- Among the tabs present, choose ‘Account.’
- You’ll be redirected to the ‘Selling Preferences’ page.
- Then, you can set the ‘All listings and orders’ tab, like automating feedback, return preferences, and more.
- Next, you have the ‘Multi-quantity listings’ section to set listings as active even when they’re out of stock.
- Below that, you have the ‘Your buyers’ tab, where you can manage your allowed buyers, blocked users, and more.
- Finally, the ‘Your monthly invoice’ section lets you set the invoice format and other relevant information.
Essentially, we have to set up our preferences, as these details serve as our business guide. When we have clear guidelines, we avoid conflicts due to misunderstandings or confusing policies. Thus, we need to provide our buyers with all the information they need about our stores, so we’ll have hassle-free transactions with them.
eBay Seller Account Requirements
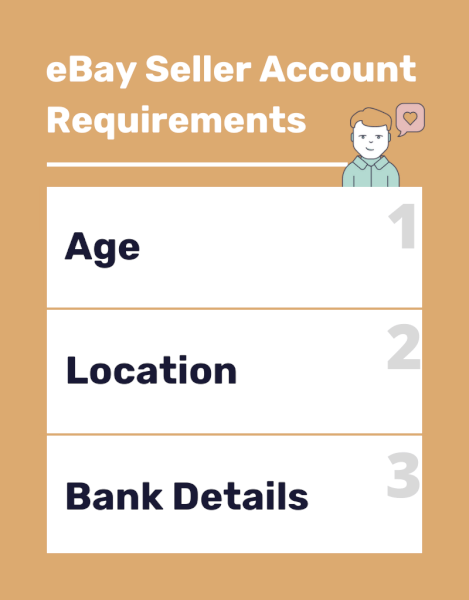
Aside from a computer and internet access, eBay has some requirements we need to meet to start selling. You will need to verify the following information:
- Age
- Location
- Bank Details (for payments)
Primarily, we can only create an eBay account if we’re at least 18 years of age. Next, we have to provide our location for the address verification process. Lastly, eBay requires us to input our bank details for payouts, such as a checking account or Payoneer.
Remember that failure to comply with these basic requirements will lead to an unsuccessful eBay seller account creation. Therefore, ensure that you pass all these prerequisites before registering on eBay.
Conclusion
There’s definitely a learning curve to selling on eBay, but AutoDS is here to help guide us on our journey. If we take it slow and consider all of these steps, we should be able to avoid any major slip-ups.
And once we’ve established ourselves as reliable sellers, we can then start to increase the number of product listings in our stores. From there, our stores will grow and so will our profits.
If you’re looking for more helpful beginner dropshipping guides, be sure to check out:


 post content
 post content
